
WEEK 12.
I was only ever planing on doing this weekly adventure
with blog entries for 12 weeks but there is still
heaps of things I have not tried or want to retry.
So hope this makes you happy that I will bee continuing.
This weeks adventure.
Having explored the pens on the ZING HERE.
But with using the pens that way there was no way I could
draw and cut as the center point was in all different places .
So this I thought i would get the yellow ZING pen holder.
(but instead of using the screw that it has, I used scrap of
vinyl and taped around the pen so it fit snug in the holder.
This way i was sure that the center point of the pen would
be so close to the center (if not in the center) and would
work for penwork and cut)


After getting it all set up I was having trouble getting it
to draw right it would leave little tails on each of the
drawn things. Trying everything I could think of to
stop this from happening. (with no luck)
I asked Fred from SkatKat if he knew why.
And he did!! He told me to turn of the off sett
and it WORKED perfectly
TIP
(thanks to skatkat)
When using pens turn the offset to "0"

Now after many try outs I was ready to start to make
something so I opened inkscape and started to make
something after many attempts with out luck I finally
realised how to get it to draw and cut what I wanted.
OH and i set up the embossing lines so I could use
the blue embossing tool to do that too


Only thing I was not happy with is i was having trouble
being able to make the stitches wider.
So first of i thought I would try a dot dash and made
another box. Which trying this box and making it
bigger than the first when cutting. I discovered
HOW to get the stitches wider
(design small and enlarge )


Here is the two together

Introducing
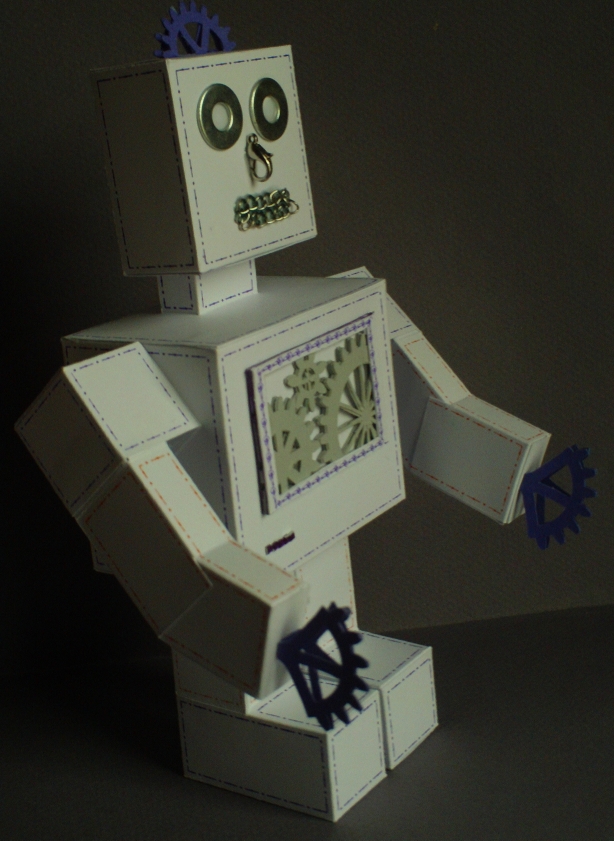
ZEWZING-BOT
I like adding pen work to my 3D things and this
ZEWZING-BOT
I like adding pen work to my 3D things and this
has opened up a whole new world to me .
So the first pattern I thought i would try is my
EC Robot (a robot i designed back when
i first got another cutter)
Using inkscape I got the stitch lines all ready as
well as all the embossing lines.
Designed all the stitching lines in the small version of the
pattern and then enlarging it before taking to make
the cut . (Takes a little time to set it all up on the layers
in make the cut , BUT it is well worth it)
Here he is with out any added extra parts to
show case the stitching pen work


And now I added some trims to him
Here he is with out any added extra parts to
show case the stitching pen work


And now I added some trims to him


OH and here is a look at what the difference
the OFF SET makes

quick card using the alota rubber stamps digital stamp
and the panel i had made for the ZewZingBots chest.
Used print and cut (robot) , as well as
pen and cut (frame)


I would have liked to do a inkscape lesson
on the stitching set up but I did run out of time
but if I get emails of interest I will make it.
I am off to explore some more.
If you live in Australia and New Zealand
and wondering where you can get a KNK Zing
SKAT KAT is the place to find them
No comments:
Post a Comment