
Here is a quick and easy way to put together a Round
box.
Make the Cut pattern HERE
LETS BEGIN
When designing it I put the base to the right and the lid to the
left . To make the base I take the top side pannel on the
right of the mat and the very right circle

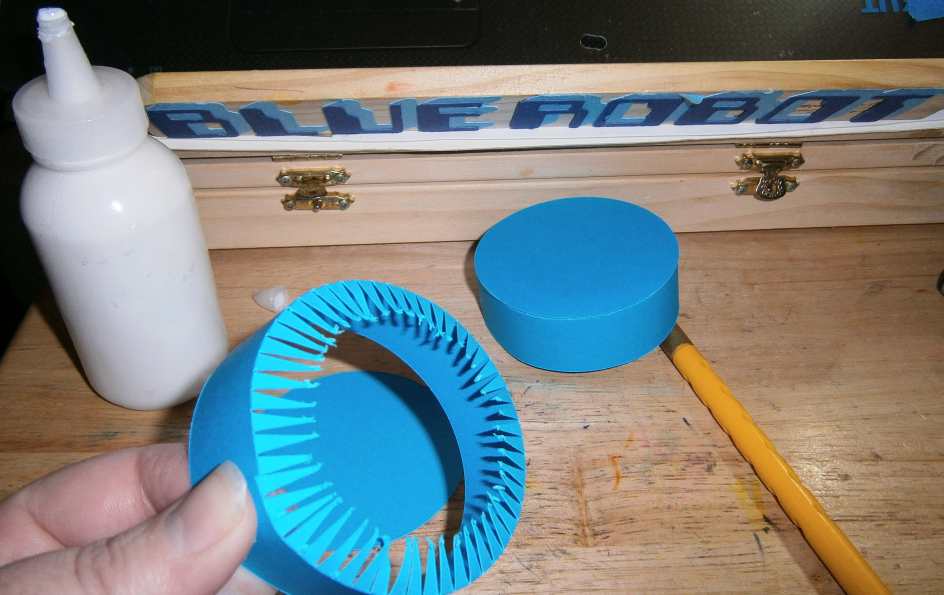
Fold the tabs in at the score line and with your fingers
give the side some shape

Now glue and the end tab (when making lesson I did not
allow mine to dry before letting go )

Now put glue aroung the Edge of the circle piece

And place it face down in your side of the box
(protect your work surface with some
backing paper of something (I didn't) )
now push around the edge with your finger
all way round

Turn it upside down

Now add the second circle to the right of the mat to the
bottom of that

And you have your base of your box made

You are left with these on your mat

take the side strip and right circle
and fold the tabs and shape the side with your fingers

join side into a circle
drop the circle with glue all around edge in face down

push down well

turn over and get the last circle of mat

And add to the bottom of base

Finished your BOX

Lid fits well

Adding a bigger base to box you now have a
hat shaped box
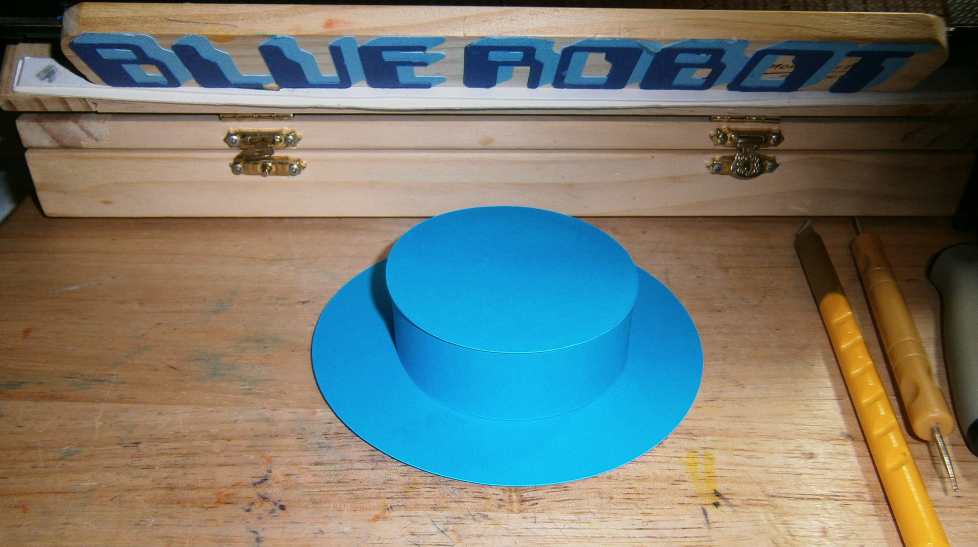

add ribbon and bow

Oh and this idea can be not only for round boxes
but can be oval boxes as well

You can make the wall of the lid shorter if you like too


1 comment:
So cool! Tutorial very well done
Post a Comment